Table of Contents
PFSense - Restore from Backup
Download pfSense image
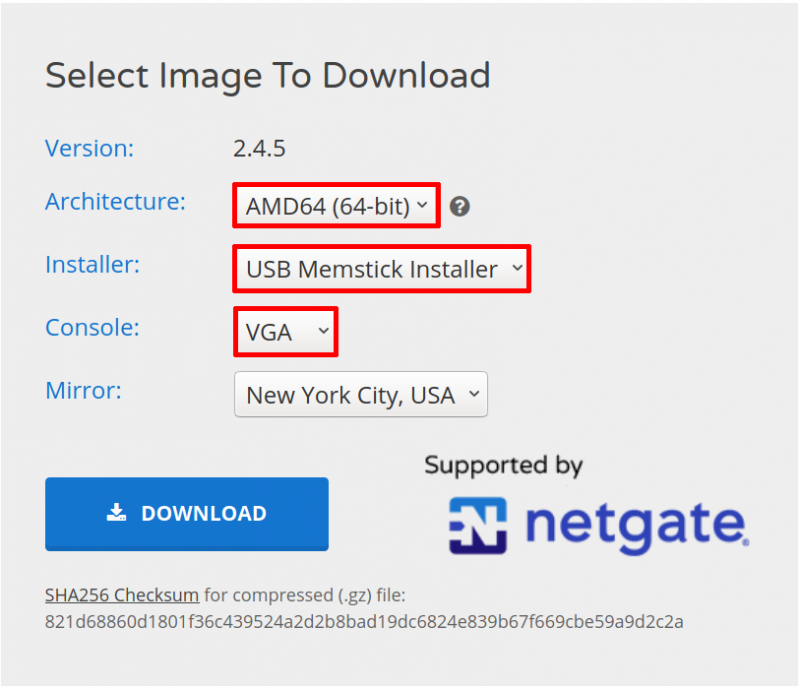
Go to https://www.pfsense.org/download/ and select the USB Memstick Installer.
NOTE: The options here are what I use.
- Architecture: AMD64 (64-bit). As I use an AMD or Intel device as the router.
- Installer: USB Memstick Installer. As I will install from a USB.
- Console: VGA. As I will plug a Keyboard and Monitor into the router; and will not be setting this up via a Serial cable.
Choose different options as required.
Burn the pfSense image on to a USB drive
sudo dd if=pfSense-CE-memstick-2.4.5-RELEASE-amd64.img of=/dev/sdb
ALERT: Make sure that if= specifies the exact location of the downloaded file and of= specifies your USB device.
If you make a mistake here, you might overwrite your hard drive!
There are many ways to check which device is connected to the USB including:
dmesg
returns:
...
[411849.265872] usb 3-2: new high-speed USB device number 6 using xhci_hcd
[411849.418209] usb 3-2: New USB device found, idVendor=048d, idProduct=1234
[411849.418210] usb 3-2: New USB device strings: Mfr=1, Product=2, SerialNumber=3
[411849.418211] usb 3-2: Product: Disk 2.0
[411849.418212] usb 3-2: Manufacturer: USB
[411849.418212] usb 3-2: SerialNumber: 2146711134684684
[411849.418481] usb-storage 3-2:1.0: USB Mass Storage device detected
[411849.418603] scsi host12: usb-storage 3-2:1.0
[411850.422697] scsi 12:0:0:0: Direct-Access     VendorCo ProductCode      2.00 PQ: 0 ANSI: 4
[411850.422989] sd 12:0:0:0: Attached scsi generic sg1 type 0
[411850.423703] sd 12:0:0:0: [sdb] 3891200 512-byte logical blocks: (1.99 GB/1.86 GiB)
[411850.423817] sd 12:0:0:0: [sdb] Write Protect is off
[411850.423819] sd 12:0:0:0: [sdb] Mode Sense: 03 00 00 00
[411850.423936] sd 12:0:0:0: [sdb] No Caching mode page found
[411850.423941] sd 12:0:0:0: [sdb] Assuming drive cache: write through
[411850.426796]  sdb: sdb1 sdb2 sdb3
                 sdb2: <bsd: sdb5 >
[411850.427528] sd 12:0:0:0: [sdb] Attached SCSI removable disk
In this example, the device is shown as sdb.
If you are using Windows, use Rufus: https://rufus.akeo.ie/.
Add the Backup file to the USB
pfSense can automatically restore the configuration from the XML backup file.
After writing the installer image to the USB drive, you might see a partition named FATRECOV. If you do see this partition (as in the ARM-based image), place the backup file in the root of that drive and call it config.xml.
Otherwise, copy the backup file, named config.xml onto another USB drive, in the root directory.
TODO: Check if this works: To Restore the config.
To have the pfSense installer apply the config automatically at the end of the installation, place the config file under /conf/config.xml on the install USB.
NOTE: An alternative to booting up from USB is to connect using a Console Cable.
Boot from the USB
Restore
Choose Recover config.xml when the option appears.
Pick the existing installation drive (e.g. ada0), the selection list shows the disk name, size, and filesystem type which is typically enough to identify the disk.
Proceed through the installation as usual.

